How to do TikTok SEO
The meteoric rise of TikTok has fundamentally changed how we consume and create content. Its focus on short-form, engaging videos offers a unique platform for creators to build communities and brands. But how can creators and businesses ensure their content reaches a broader audience? Enter TikTok SEO. In this blog, we’ll explore what TikTok SEO is and how you can leverage it to enhance your visibility on the platform.
What is TikTok SEO?
TikTok SEO refers to optimizing your content on TikTok to increase its discoverability through search and recommendations. Just like traditional SEO, TikTok SEO is crucial for reaching a wider audience and boosting engagement on your videos.
Key Elements of TikTok SEO
Here’s where TikTok SEO comes in – a strategic approach to getting your videos discovered by the right audience.
Know Your Audience, Speak Their Language
The bedrock of any successful SEO strategy is understanding your target audience. What content resonates with them on TikTok? What are their interests and challenges? Delve into the world of hashtag research – a treasure trove of insights. You can uncover what people are searching for by analyzing trending hashtags in your niche. Integrate these hashtags naturally into captions and descriptions, acting as signposts for viewers interested in similar content.
Profile Optimization
Your TikTok profile is the first impression viewers get of your brand. Choose a username and display a name that is easy to remember and relevant to your content. Craft a compelling bio that clearly describes who you are and what you offer, and include any relevant links, such as to your website or other social media profiles.
Keyword Research and Hashtags Strategy
Keywords play a significant role in TikTok SEO. Identify relevant keywords that your target audience is searching for. Use these keywords strategically in your captions and hashtags to increase the chances of your content being discovered.
Hashtags are essential for categorizing your content and making it discoverable. Use a mix of trending and niche-specific hashtags to reach a broader audience while targeting specific groups. This balance will help maximize your content’s reach.
Keywords and hashtags are the secret sauce for discoverability on TikTok. As you craft your videos, strategically weave relevant keywords into captions and descriptions. But don’t stop there! Use trending hashtags to ride the wave of popular conversations and expand your reach. Consider using “trigger words” that pique curiosity and compel viewers to stop scrolling and engage with your video.
Content Creation
Create high-quality, engaging content that resonates with your audience. Use descriptive captions and text overlays to enhance your videos’ SEO. Additionally, incorporating popular sounds and participating in trends can boost your content’s visibility.
Engagement and Interaction
Engagement is a critical factor in TikTok’s algorithm. Encourage viewers to comment, like, and share your videos. Respond to comments and engage with your audience to build a loyal community. Collaborations and duets with other creators can also increase your reach.
Don’t be a passive participant in the TikTok universe! Actively engage with your audience by commenting on and liking other videos. This fosters a sense of community and encourages viewers to reciprocate the engagement of your content. Remember, it’s a two-way street!
Collaboration is the New Black
The beauty of TikTok lies in its collaborative spirit. Partnering with established creators in your niche is a golden opportunity to amplify your reach and tap into fresh audiences. Explore the possibilities – create duet videos, stitch responses, or even jump on trending hashtag challenges. Collaborations foster a sense of community and allow you to learn valuable insights from experienced creators in your niche.
Analytics and Adjustments
Check TikTok Analytics regularly to monitor your content’s performance. Key metrics include views, likes, shares, and comments. Use this data to understand what works and adjust your strategy accordingly.
While TikTok thrives as a standalone platform, consider the power of a website or blog to bolster your presence. Use it as a home base for your TikTok videos, and strategically weave in relevant keywords to enhance your search engine ranking. This synergy between your TikTok content and your website attracts viewers across the digital landscape.
The All-Important Call to Action
Don’t let viewers watch and disappear into the endless scroll. Guide them toward the next step! In your bio and videos, incorporate clear calls to action that direct viewers to your other social media platforms or website. This keeps the conversation flowing and helps you cultivate a loyal following across all your online channels.
By embracing these TikTok SEO strategies, you can see the power of the TikTok algorithm and transform your content into discoverable treasures. Remember, consistency is key! The more you create engaging content and actively participate in the TikTok community, the more likely you will attract a wider audience and achieve your social media goals.
Conclusion
TikTok SEO is essential for increasing your content’s visibility and engagement on the platform. You can maximize TikTok’s potential by optimizing your profile, using the right keywords and hashtags, creating engaging content, and interacting with your audience. Start implementing these strategies today and watch your TikTok presence grow!
How to Start Instagram Live and Get Succ
Instagram Live is a powerful tool for connecting with your audience in real-time. It’s a great way to host Q&A sessions, behind-the-scenes tours, or chat with your followers to get to know them better. In this blog post, we’ll walk you through the steps to start a live broadcast on Instagram and provide some tips for making your live streams successful.
How to Start a Live Broadcast on Instagram
Getting started with Instagram Live is easy. Here’s how to do it:
- Open the Instagram app and swipe right from the home screen.
- Select the “Live” option at the bottom of the screen.
- You can add a title to your live stream before you go live.
- Once you’re ready to go live, tap the “Start Live Video” button.
Benefits of Using Instagram Live
There are many benefits to using Instagram Live, including:
- Increased engagement: Your followers will receive a notification when you start a live session. This can help you expand your audience and create a more personal connection with your followers. Real-time interaction is a powerful tool for nurturing relationships with your audience.
- Build relationships: Live streams enable real-time interaction with followers, allowing you to answer questions, respond to comments, and conduct polls or quizzes, fostering stronger audience relationships.
- Promote products or services: Live streams are an effective way to promote products or services. They can showcase products, answer questions, and offer exclusive discounts to viewers.
- Go behind the scenes: Live streams give you a chance to give your followers a behind-the-scenes look at your business or brand. You can use live streams to take your followers on a workspace tour, introduce them to your team, or show them how you create your products or services.
Tips for Making Your Live Streams Successful
Here are a few specific tips for making your Instagram Live streams successful: Promote your live stream in advance, have a clear plan, be engaging, use high-quality audio and video, and end your live stream with a call to action. These strategies can help you make the most of your live broadcasts.
Promote Live Stream in Advance:
Post about it on your Instagram story or feed to let your followers know you’re going live. You can also use other social media platforms to promote your live stream. This preparation will ensure your audience is ready and waiting for your live stream.
Have a plan:
Before you go live, take some time to plan out your livestream. What are you going to talk about? How long are you going to go live for? A plan will help you stay on track and maximise your time.
Be engaging:
Interact with your viewers throughout your live stream. Answer their questions, respond to their comments, and even take polls or quizzes. The more you interact with your viewers, the more engaged they will be.
Use high-quality Audio and Video:
Ensure the quality of your audio and video so your viewers can see and hear you.
End your live stream with a call to action:
Tell your viewers what you want them to do after you’ve finished broadcasting. For example, ask them to follow you on Instagram, subscribe to your YouTube channel, or visit your website.
By following these tips, you can use Instagram Live to connect with your audience in real time, build relationships, and promote your products or services. Now, it’s your turn. Share your Instagram Live success stories or ask any questions you may have in the comments below.
The Best Time to Post on Instagram (And
Instagram, boasting over a billion active daily users sharing photos, videos, and stories, reigns supreme as a social media platform. However, the frustration of low reach and engagement on your posts is a universal experience, be you a brand, influencer, or casual user. But the frustration of low reach and engagement is universal, affecting brands, influencers, and casual users alike. The good news? Strategic timing can significantly boost your content’s impact. This blog delves into the best times to post on Instagram while equipping you with strategies to identify the optimal posting schedule for your unique audience.
Why Timing Matters For Instagram Posting
Timing is crucial on Instagram for several compelling reasons:
- Maximize Engagement: Posting when your audience is most active ensures your content is seen, liked, and commented on, leading to higher engagement rates.
- Algorithm Prioritization: Instagram’s algorithm favors posts with high engagement. By posting at optimal times, your content is more likely to receive immediate interactions, which can increase its visibility and boost its reach.
- Reach More Users: Strategically timing your posts allows you to connect with followers across different time zones, maximizing your overall reach and visibility on the platform.
General Best Times to Post on Instagram
While there are no one-size-fits-all answers, several studies and social media tools like Buffer and SocialPilot have analyzed millions of posts to identify general best times to post on Instagram. These insights serve as a valuable starting point to optimize your posting schedule for maximum engagement.
General Recommendations:
- Focus on Weekdays: Engagement tends to be higher on weekdays compared to weekends.
- Favour Midweek: Tuesdays, Wednesdays, and Thursdays often see the most activity.
- Explore Specific Time Slots:
- Early Morning (6 AM – 9 AM): Ideal for reaching users who check Instagram first thing after waking up or commuting to work.
- Lunchtime (11 AM – 1 PM): Caters to users scrolling through their feeds during their lunch break.
- Evening (5 PM – 7 PM): Targets users winding down after work or relaxing in the evening.
Remember: These are general guidelines. The key to unlocking peak engagement lies in understanding your specific audience.
How to Find Your Best Time to Post on Instagram
While general guidelines can be helpful, it’s essential to tailor your posting schedule to your specific audience. Here’s how you can find the best time to post on Instagram for your account:
- Leverage Instagram Insights: Analyze your audience demographics and location data within Instagram Insights. This reveals when your followers are most active, providing valuable insights into your ideal posting times.
- A/B Test Different Times: Experiment with posting at various times throughout the week and track the results. This data will help you identify the most effective schedule for reaching your specific audience.
- Consider Your Content Type: The optimal time to post might vary depending on your content type. For instance, eye-catching visuals might perform better during high-traffic evening hours, while informative posts might be better suited for lunchtime when users have more time to read.
By combining these general best practices with audience insights and A/B testing, you can develop a personalized Instagram posting schedule that maximizes engagement and reaches your target audience effectively.
How to Analyze Your Audience Insights?
Instagram offers valuable insights for business and creator accounts. To access them, simply go to your profile, tap the three horizontal lines in the top right corner, and select “Insights.”
Within the “Audience” tab, scroll down to the “Followers” section. Here, you’ll find data on when your followers are most active, broken down by day and hour. This information is crucial for pinpointing your ideal posting times.
You can also use Third Party Analytics Tools:
For even deeper insights, consider exploring third-party analytics tools like Buffer, SocialPilot, Later, or Hootsuite. These platforms offer detailed analytics that can help you determine the best times to post based on your audience’s specific activity patterns.
Remember, your audience’s behavior might change over time. Make a habit of regularly reviewing Instagram Insights or any third-party analytics you use. This allows you to identify any shifts in your audience’s activity and adjust your posting schedule accordingly. By staying flexible and data-driven, you can ensure your content reaches your target audience when they’re most receptive.
Conclusion
Finding the best time to post on Instagram is a dynamic process that requires analysis and experimentation. While general guidelines can provide a helpful starting point, tailoring your posting schedule to your specific audience’s behavior will yield the best results. Utilize Instagram Insights and third-party analytics tools to monitor engagement, and be prepared to adjust your strategy as your audience evolves.
How to Deal With Negative Comments on So
Negative comments on social media can be challenging, but handling them effectively can turn a potential PR crisis into an opportunity for growth and customer loyalty. By addressing these comments thoughtfully, you not only resolve the immediate issue but also demonstrate your commitment to customer satisfaction. Here are some strategies to consider to manage negative feedback constructively and maintain a positive online presence:
1. Respond Promptly and Politely
Timely responses show that you are attentive and care about customer feedback. Acknowledge the issue and let the commenter know you’re looking into it. This quick and polite engagement demonstrates that you value their input and are committed to addressing their concerns. Prompt responses can help de-escalate a potentially negative situation and prevent it from spiraling out of control, turning a dissatisfied customer into a loyal one.
2. Stay Calm and Professional
Maintain a calm and professional tone, even if the comment is harsh or unfair. Avoid getting defensive or emotional. A composed response shows that you are in control and takes the high road, reflecting positively on your brand. Staying professional helps to de-escalate the situation and prevents further aggravation, making it easier to resolve the issue and demonstrating to other users that you handle criticism constructively.
3. Apologize Sincerely
A genuine apology is a powerful tool for managing negative social media feedback. It not only defuses anger but also demonstrates your commitment to customer satisfaction. When faced with a complaint, whether you agree with it or not, offering an apology for any inconvenience caused shows empathy and respect for the customer’s experience. This simple gesture can often turn a potentially contentious situation into an opportunity to build trust and goodwill. It shows that you prioritize customer relationships over being right, fostering a positive perception of your brand among both the complainant and other observers. Therefore, always consider the impact of a sincere apology as a crucial step in effectively managing negative comments on social media.
4. Take the Conversation Offline
If the issue at hand is intricate or involves confidential information, it’s advisable to steer the conversation to a more private channel such as direct messages, email, or a phone call. This approach ensures that sensitive details remain confidential and prevents them from being discussed publicly on social media platforms. By suggesting this move, you demonstrate respect for the privacy of the parties involved and show a proactive commitment to resolving the issue discreetly and effectively. This also helps maintain a professional image for your brand by handling customer concerns with appropriate confidentiality and care.
5. Acknowledge and Appreciate Feedback
After addressing the issue, it’s important to thank the commenter for their feedback. This simple act demonstrates that you value customer input and are committed to continuous improvement. By expressing gratitude, you acknowledge their contribution to helping your brand evolve and enhance its offerings. This approach not only fosters a positive relationship with the commenter but also sends a message to other customers that their feedback is valued and taken seriously. It’s a key step in building trust and loyalty, showing that your brand is responsive and customer-centric.
6. Provide Solutions or Next Steps
When responding to negative feedback, it’s crucial to offer a solution or outline the steps you are taking to address the issue. This demonstrates your commitment to resolving the problem and shows that you take customer concerns seriously. Here’s how you can approach it:
- Offer a Solution: Provide a clear and actionable solution to the problem mentioned in the feedback. Whether it’s a product issue, a service complaint, or any other concern, outline what you can do to rectify the situation.
- Explain Steps Taken: If the issue requires time or further investigation, explain the specific steps you are taking to investigate, resolve, or improve the situation. This transparency reassures the customer that their issue is being actively addressed.
- Show Empathy: Express empathy for any inconvenience caused and reassure the customer that you are committed to ensuring their satisfaction.
- Invite Feedback: Encourage the customer to reach out if they have further questions or concerns, and assure them that you are available to help.
By providing a clear path forward and demonstrating your dedication to resolving issues promptly and effectively, you not only address the immediate complaint but also showcase your brand’s commitment to customer service and satisfaction. This approach helps turn negative experiences into opportunities for positive engagement and customer loyalty.
7. Monitor and Analyze Feedback
Regularly monitoring social media for feedback is essential for any business looking to maintain a positive online presence and address customer concerns effectively. By actively engaging with negative comments and analyzing trends, you can identify common issues that may require your attention. Here’s how to approach it:
- Set Up Monitoring Tools: Use social media management tools or platforms that allow you to track mentions, comments, and messages related to your brand. This enables you to stay updated in real-time about what customers are saying.
- Categorize Feedback: Organize feedback into categories such as product issues, customer service complaints, shipping problems, etc. This helps you spot recurring themes and prioritize areas for improvement.
- Identify Trends: Look for patterns in negative comments. Are there particular products or services receiving more complaints? Are there recurring issues with a certain aspect of your business operations? Identifying trends helps you pinpoint systemic problems that need addressing.
- Quantify Feedback: Quantitative analysis, such as tracking the frequency of specific complaints or sentiment analysis (positive vs. negative comments), provides insights into the overall perception of your brand and areas needing improvement.
- Act Promptly: Once you identify common issues, take proactive steps to address them. This might involve improving product quality, revising customer service protocols, or enhancing communication strategies.
- Engage with Customers: Respond to negative feedback promptly and professionally. Let customers know you’re aware of the issue and are taking steps to rectify it. This demonstrates accountability and shows that you value customer input.
- Continuous Improvement: Use feedback not just to resolve immediate issues but also to drive continuous improvement. Incorporate customer insights into your business strategies to enhance overall customer satisfaction and loyalty.
8. Avoid Deleting Negative Comments
Avoid deleting genuine complaints on social media unless they are abusive, offensive, or spam, as doing so can give the impression of hiding negative feedback and erode trust. Transparency is key to maintaining credibility; addressing criticism openly demonstrates commitment to customer service and can turn dissatisfied customers into loyal advocates. Publicly handling negative feedback shows responsiveness and a willingness to improve, which can enhance your brand’s reputation. By engaging with criticism constructively, you foster a community around your brand and show that you value customer input, contributing to a positive online presence and stronger customer relationships overall.
9. Learn from Criticism
Negative comments should be viewed as valuable learning opportunities rather than just criticisms. They often offer insights into areas where your business can improve, whether it’s product quality, customer service processes, or communication strategies. By analyzing the underlying issues behind negative feedback, businesses can identify patterns, prioritize necessary changes, and ultimately enhance the overall customer experience. Embracing negative feedback in this way demonstrates a proactive approach to continuous improvement and shows customers that their opinions are valued, fostering trust and loyalty in the long run. Therefore, leveraging negative comments as learning opportunities is crucial for refining business practices and maintaining competitiveness in today’s market.
10. Educate Your Team
It’s essential to ensure that every member of your team is equipped with the knowledge and skills to handle negative comments effectively on social media. Consistency in responses is key to maintaining a professional image and fostering trust with your audience. Provide training or guidelines that outline the best practices for responding to criticism: staying calm, empathizing with the customer’s experience, acknowledging the issue, offering solutions or next steps, and maintaining a respectful tone throughout. By preparing your team to handle negative feedback with professionalism and consistency, you can effectively manage customer concerns, demonstrate accountability, and enhance your brand’s reputation for excellent customer service. This approach not only helps to resolve issues swiftly but also contributes to a positive online presence that builds customer loyalty over time.
Conclusion
By implementing these strategies, you can effectively manage negative comments on social media. Remember, negative feedback is an opportunity to showcase your dedication to customer service and improvement. Handling criticism with professionalism and empathy can turn dissatisfied customers into advocates for your brand.
Embrace negative comments as opportunities for growth, and use them to enhance your products, services, and overall customer experience. A thoughtful and constructive approach to handling negativity can strengthen your online presence and foster long-term customer loyalty.
How to See Who Viewed Your Instagram Pos
Instagram is a popular platform for sharing photos, videos, and stories with friends and followers. One of the features users are curious about is seeing who has viewed their posts. While Instagram offers some insights, it provides a more complex way to see the specific users who have viewed your individual posts. However, you can see who viewed your Instagram Stories and videos. In this blog, we’ll explore the ways you can get insights on your Instagram post views and other related features.
Understanding Instagram’s View Metrics
Before diving into the methods to see who viewed your posts, it’s important to understand the different metrics Instagram offers:
- Post Likes and Comments: You can see who liked and commented on your posts by tapping on the likes or comments below the post.
- Story Views: You can see who viewed your Instagram Stories by swiping up on the Story.
- Video Views: You can see the number of views on your videos, but not who specifically viewed them unless they liked or commented.
How to See Who Viewed Your Instagram Stories
Instagram Stories allow you to see exactly who has viewed them. Here’s how you can check:
- Open Instagram: Launch the Instagram app on your mobile device.
- Go to Your Story: Tap on your profile picture at the top left of the screen to open your Story.
- Swipe Up: Swipe up on the screen. You will see a list of usernames of people who have viewed your Story.
This feature is helpful if you want to know who is engaging with your Stories on a day-to-day basis.
How to See Views on Instagram Videos
For video posts, Instagram shows the number of views, but it doesn’t reveal the identities of those viewers unless they like or comment on the video. Here’s how to check video views:
- Open Instagram: Launch the Instagram app on your mobile device.
- Go to Your Profile: Tap on your profile picture in the bottom right corner to go to your profile page.
- Open the Video: Tap on the video post you want to check.
- View Count: Below the video, you will see the number of views. Tap on the view count to see the list of users who liked the video.
Using Instagram Insights for More Detailed Analytics
If you have a business or creator account on Instagram, you can access Instagram Insights, which provides more detailed analytics about your posts, stories, and audience. Here’s how to access Insights:
- Switch to a Business or Creator Account: If you haven’t already, switch your personal account to a business or creator account in the settings.
- Open Instagram: Launch the Instagram app on your mobile device.
- Go to Your Profile: Tap on your profile picture in the bottom right corner.
- Open Insights: Tap the three horizontal lines (hamburger icon) in the top right corner, then select “Insights.”
- View Post Analytics: Under the Content section, tap on the specific post you want to analyze. You can see data on reach, impressions, and interactions.
While Insights won’t show you the specific users who viewed your posts, it provides valuable data on how your content is performing overall. In case you don’t have a professional Instagram account, here’s how to create it.
Conclusion
While Instagram doesn’t allow you to see who viewed your individual posts, you can still get useful engagement information through likes, comments, and Instagram Insights. For Stories and videos, Instagram provides more specific view metrics. By utilizing these features, you can gain a better understanding of your audience’s interaction with your content.
Remember, Instagram regularly updates its features, so it’s a good idea to keep an eye on the latest updates from the platform. Stay engaged with your followers and continue creating content that resonates with them!
How to Check If Someone Blocked You on I
Instagram is a great platform for sharing photos, videos, and connecting with friends and family. However, sometimes you might notice that you’re unable to see someone’s posts or interact with their profile. This could be a sign that you’ve been blocked. In this blog post, we’ll explore the various methods you can use to check if someone has blocked you on Instagram.
Signs That You Might Have Been Blocked
Before diving into specific methods, it’s important to recognize the signs that might indicate you’ve been blocked:
- Profile Not Found: When you search for their username, their profile doesn’t appear.
- Unable to Follow: If you find their profile but can’t follow them, it’s a red flag.
- No Posts Visible: Their profile shows a message like “No Posts Yet” even if you know they have posted.
- Missing Direct Messages: Your conversation with them disappears from your DMs.
Methods to Check If You’ve Been Blocked
1. Search for Their Profile
The simplest way to check if someone has blocked you is to search for their profile directly. Here’s how:
- Open Instagram: Go to the search bar.
- Type Their Username: Enter the exact username of the person you suspect has blocked you.
- Check Results: If their profile doesn’t appear in the search results, you might have been blocked.
Keep in mind that they might have also deactivated their account, so this method isn’t foolproof.
2. Use a Web Browser
Sometimes, searching for the profile through a web browser can give you more clues:
- Open a Web Browser: Go to Instagram’s website.
- Search Their Username: Enter the URL as www.instagram.com/username (replace “username” with their actual username).
- Analyze the Result: If you get a “Sorry, this page isn’t available” message, you might be blocked. However, this can also mean they’ve changed their username or deactivated their account.
3. Check Through a Mutual Friend’s Account
Using a mutual friend’s account can help confirm your suspicions:
- Ask a Friend: Have a mutual friend search for the person’s profile.
- Compare Results: If your friend can find and view their profile, but you can’t, it’s likely you’ve been blocked.
4. Check Direct Messages
Your past interactions can also provide clues:
- Open Instagram: Go to your direct messages.
- Find Past Conversations: Look for previous chats with the person.
- Analyze Messages: If their name appears as “Instagrammer” and you can’t click on their profile, they may have blocked you.
5. Try to Follow Them
If you can find their profile but suspect you’ve been blocked, try this:
- Visit Their Profile: Tap on their profile.
- Follow Button: Try to follow them. If you’re instantly unfollowed, it’s a sign you’ve been blocked.
Additional Considerations
Private Account
If the person has a private account, and you can’t find them, it’s possible they removed you as a follower or blocked you. However, if their profile says “This Account is Private” when viewed from a mutual friend’s account, it’s more likely they just removed you.
Deactivated Account
If someone deactivates their account, you won’t be able to find them. Try searching for their profile from another account to confirm.
If you’re also interested in tracking your new followers, check out our previous blog post on How to See Your Recent Followers. It provides detailed steps and tools to help you keep track of who’s following you on Instagram.
Conclusion
Finding out if you’ve been blocked on Instagram can be tricky, but using these methods can help you gather enough evidence. Remember to consider other possibilities like account deactivation or username changes. It’s also important to respect the privacy and decisions of others on social media.
Do you have any other tips for figuring out if someone blocked you on Instagram? Share your thoughts in the comments!
How to See Who I Unfollowed on Instagram
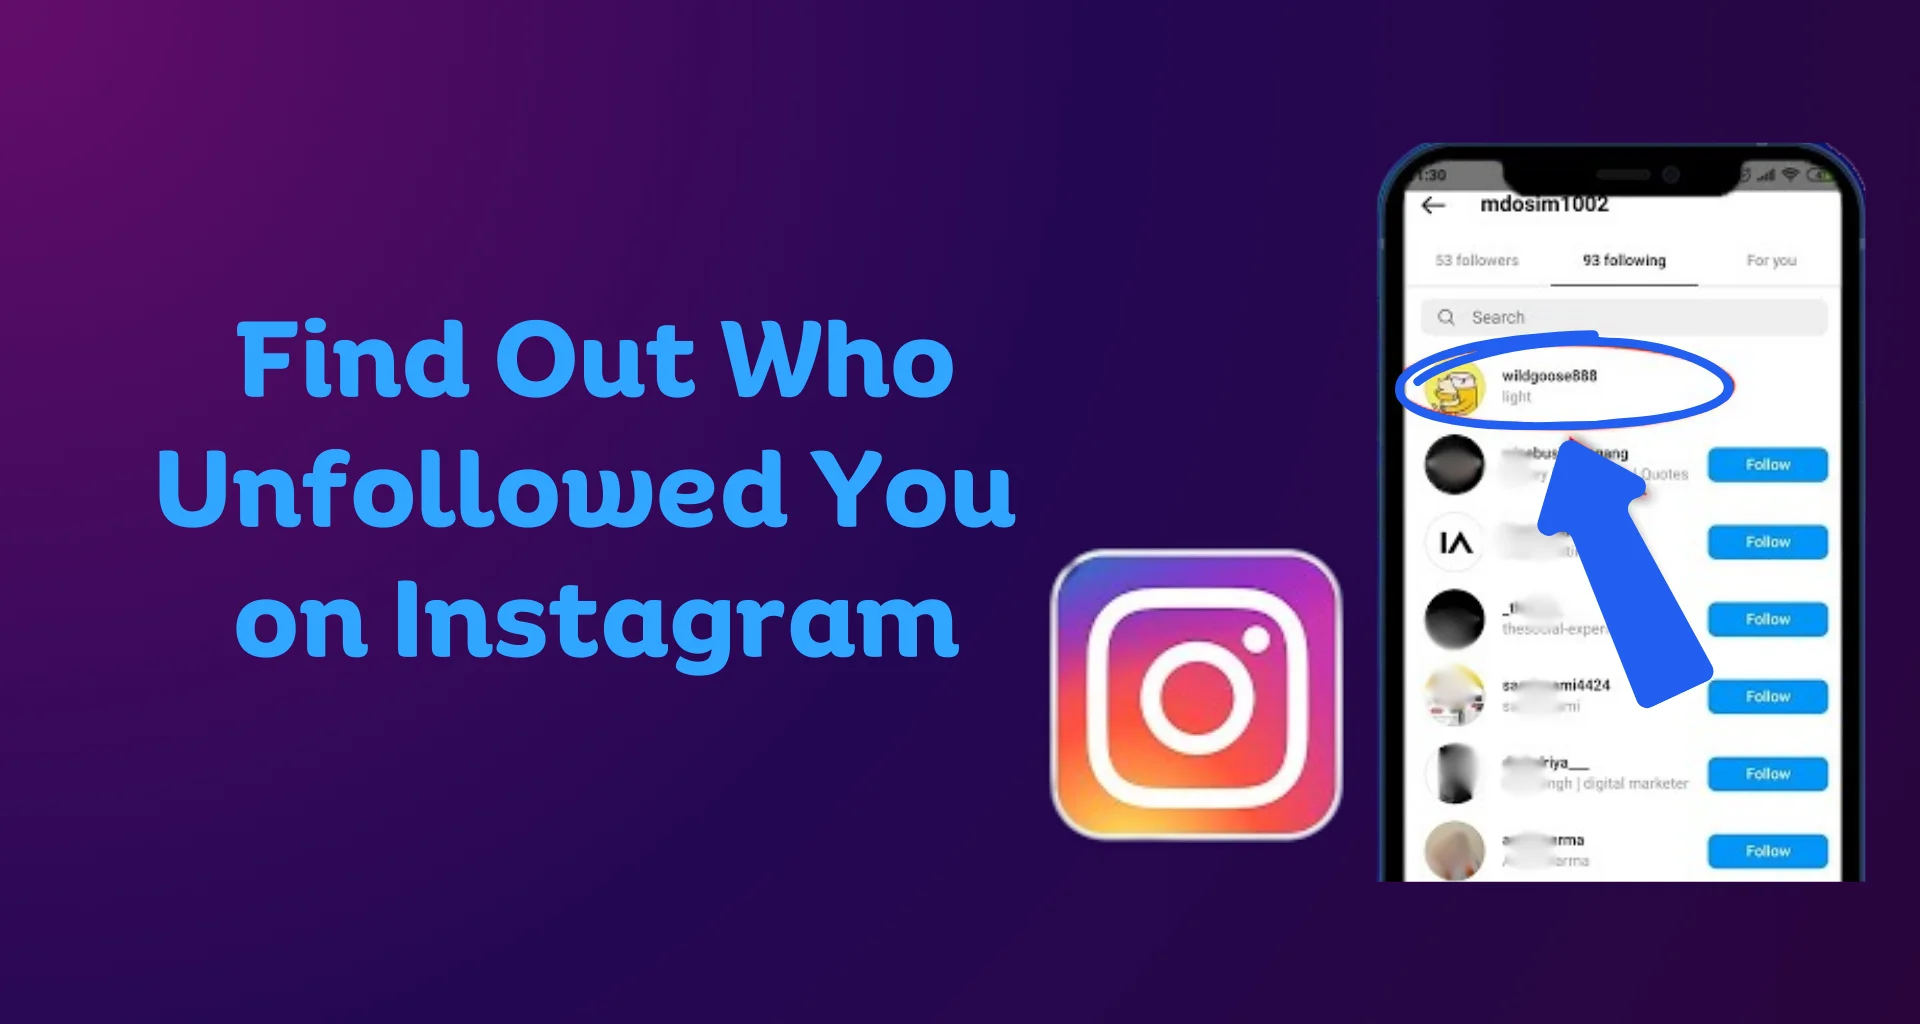
Unfollowing someone on Instagram can happen accidentally, or sometimes you might just want to revisit the list of people you’ve decided to unfollow. Instagram doesn’t provide a direct way to see who you’ve unfollowed, but there are a few methods you can use to keep track. In this blog post, we’ll explore some practical steps and tools to help you see who you’ve unfollowed on Instagram.
Why Would You Want to See Who You Unfollowed?
Before diving into the methods, let’s discuss why you might want to see who you unfollowed:
- Accidental Unfollowing: Sometimes, you might unfollow someone by mistake and want to re-follow them.
- Reconsidering Decisions: You might want to revisit your decision and re-follow certain accounts.
- Monitoring Activity: Keeping track of your follow/unfollow activity can help you manage your social media presence more effectively.
Methods to See Who You Unfollowed
1. Manual Tracking
The most straightforward way to keep track of who you unfollow is to do it manually. This involves maintaining a list of accounts you follow and updating it regularly. Here’s how you can do it:
- Create a Spreadsheet: Use a tool like Google Sheets or Excel to create a list of accounts you follow.
- Regular Updates: Update this list regularly, especially before and after you make changes to your following list.
- Compare Lists: Periodically compare the current list of accounts you follow with the previous version to identify any changes.
While this method can be tedious, it provides you with full control over your follow/unfollow activity.
2. Third-Party Apps
Several third-party apps can help you keep track of your follow/unfollow activity on Instagram. Here are a few popular options:
- Followers & Unfollowers: This app allows you to see who unfollowed you, and it can help you track your own unfollowing activity.
- FollowMeter: FollowMeter provides insights into your Instagram account, including who unfollowed you.
- Unfollowers & Ghost Followers: This app helps you identify accounts you’ve unfollowed, as well as accounts that don’t follow you back.
When using third-party apps, be cautious about granting access to your Instagram account. Ensure the app is reputable and read reviews to avoid potential security risks.
3. Instagram Activity Log
While Instagram doesn’t provide a direct way to see who you’ve unfollowed, you can use the activity log to get some insights. Here’s how:
- Go to Your Profile: Open the Instagram app and go to your profile.
- Access Settings: Tap the three horizontal lines (menu) in the top right corner and select “Settings”.
- Account Activity: Navigate to “Your Activity” to see a summary of your interactions, including follow/unfollow actions.
This method doesn’t provide a comprehensive list of who you’ve unfollowed but can give you an overview of your recent activity.
If you’re also interested in seeing who your recent followers are, check out our previous blog post on How to See who unfollowed you on Instagram. It provides detailed steps and tools to help you track new followers on Instagram.
Tips for Managing Your Following List
- Regular Reviews: Periodically review your following list to ensure it aligns with your current interests and connections.
- Use Categories: Create categories or lists (mentally or in a document) to organize the accounts you follow, making it easier to manage them.
- Engagement Check: Unfollow accounts that don’t engage with your content or that you no longer find interesting.
Conclusion
Tracking who you’ve unfollowed on Instagram isn’t straightforward, but with a combination of manual tracking, third-party apps, and Instagram’s activity log, you can get a good idea of your follow/unfollow activity. By staying organized and periodically reviewing your following list, you can manage your Instagram presence more effectively.
Do you have any tips or tools that you use to track your unfollowing activity on Instagram? Let us know in the comments!
How to Know If Someone Unfollowed You on
Social media platforms like Instagram are all about building connections and maintaining relationships. However, sometimes you may notice a drop in your follower count and wonder who decided to hit the unfollow button. Instagram doesn’t make it easy to see who unfollows you, but you can find out by following a few tips. In this blog, we’ll explore how to know if someone unfollowed you on Instagram, discuss whether Instagram notifies you when someone unfollows, and guide you on using apps to track your followers.
Does Instagram Notify You When Someone Unfollows You?
Instagram does not notify you when someone unfollows you. The platform is designed to keep follower dynamics discreet, likely to maintain a positive user experience. This means that if you’re curious about who unfollowed you, you’ll need to take some extra steps to find out. Fortunately, there are several methods and tools available to help you keep track of your followers.
How to Manually Check Who Unfollowed You
One way to find out who unfollowed you is to manually check your followers list. While this method can be time-consuming, especially if you have a large number of followers, it can be effective for those with smaller accounts.
- Take Note of Your Followers: Regularly take note of your followers. You can do this by periodically scrolling through your followers list and noting the names. This approach is manageable if you have fewer followers or a small account.
- Compare Lists: If you notice a drop in your follower count, compare your current followers list with your previous list. This can help you identify who is missing.
How to Check If a Specific User Has Unfollowed You on Instagram
If you think a specific person has stopped following you on Instagram, you can confirm your suspicion by doing the following:
- Open Your Profile: Tap on your profile picture or icon in the bottom right corner of the Instagram app to go to your profile page.
- Access the Followers List: Tap on the “Followers” section, which displays the number of people following you. This will open a list of all your followers.
- Search for the User’s Name: Use the search bar at the top of your followers list to find a specific user. Enter the name or username of the person you suspect has unfollowed you.
- Check for Their Presence: If their name appears in the search results, they are still following you. If their name does not appear, it means they are no longer on your followers list, indicating that they have unfollowed you.
By following these steps, you can verify whether a particular user has stopped following you on Instagram without relying on third-party apps or tools. However, if you want to see a list of users who have unfollowed you, you can use third-party apps.
How to See Who Unfollowed You on Instagram Using an App
If manually checking your followers sounds too tedious, there are various apps available that can do the work for you. These apps track your followers and provide detailed reports on your follower dynamics. Here are some popular apps that can help you see who unfollowed you on Instagram:
- Followers Track for Instagram: This app provides insights into your followers and unfollowers. It shows who unfollowed you, who isn’t following you back, and more.
- FollowMeter: FollowMeter helps you track unfollowers, new followers, and users who don’t follow you back. It also provides engagement metrics to help you understand your followers better.
- InsTrack: InsTrack offers a detailed analysis of your followers, including who unfollowed you. It provides comprehensive reports and helps you manage your Instagram account more effectively.
Conclusion
While Instagram doesn’t notify you when someone unfollows you, there are ways to find out. By manually checking your followers list or using dedicated apps, you can keep track of who stays and who leaves. Understanding these dynamics can help you improve your content and engagement strategies. So, whether you prefer to do it the old-fashioned way or rely on technology, staying informed about your followers can help you grow and maintain a thriving Instagram presence.
How to see who someone recently followed
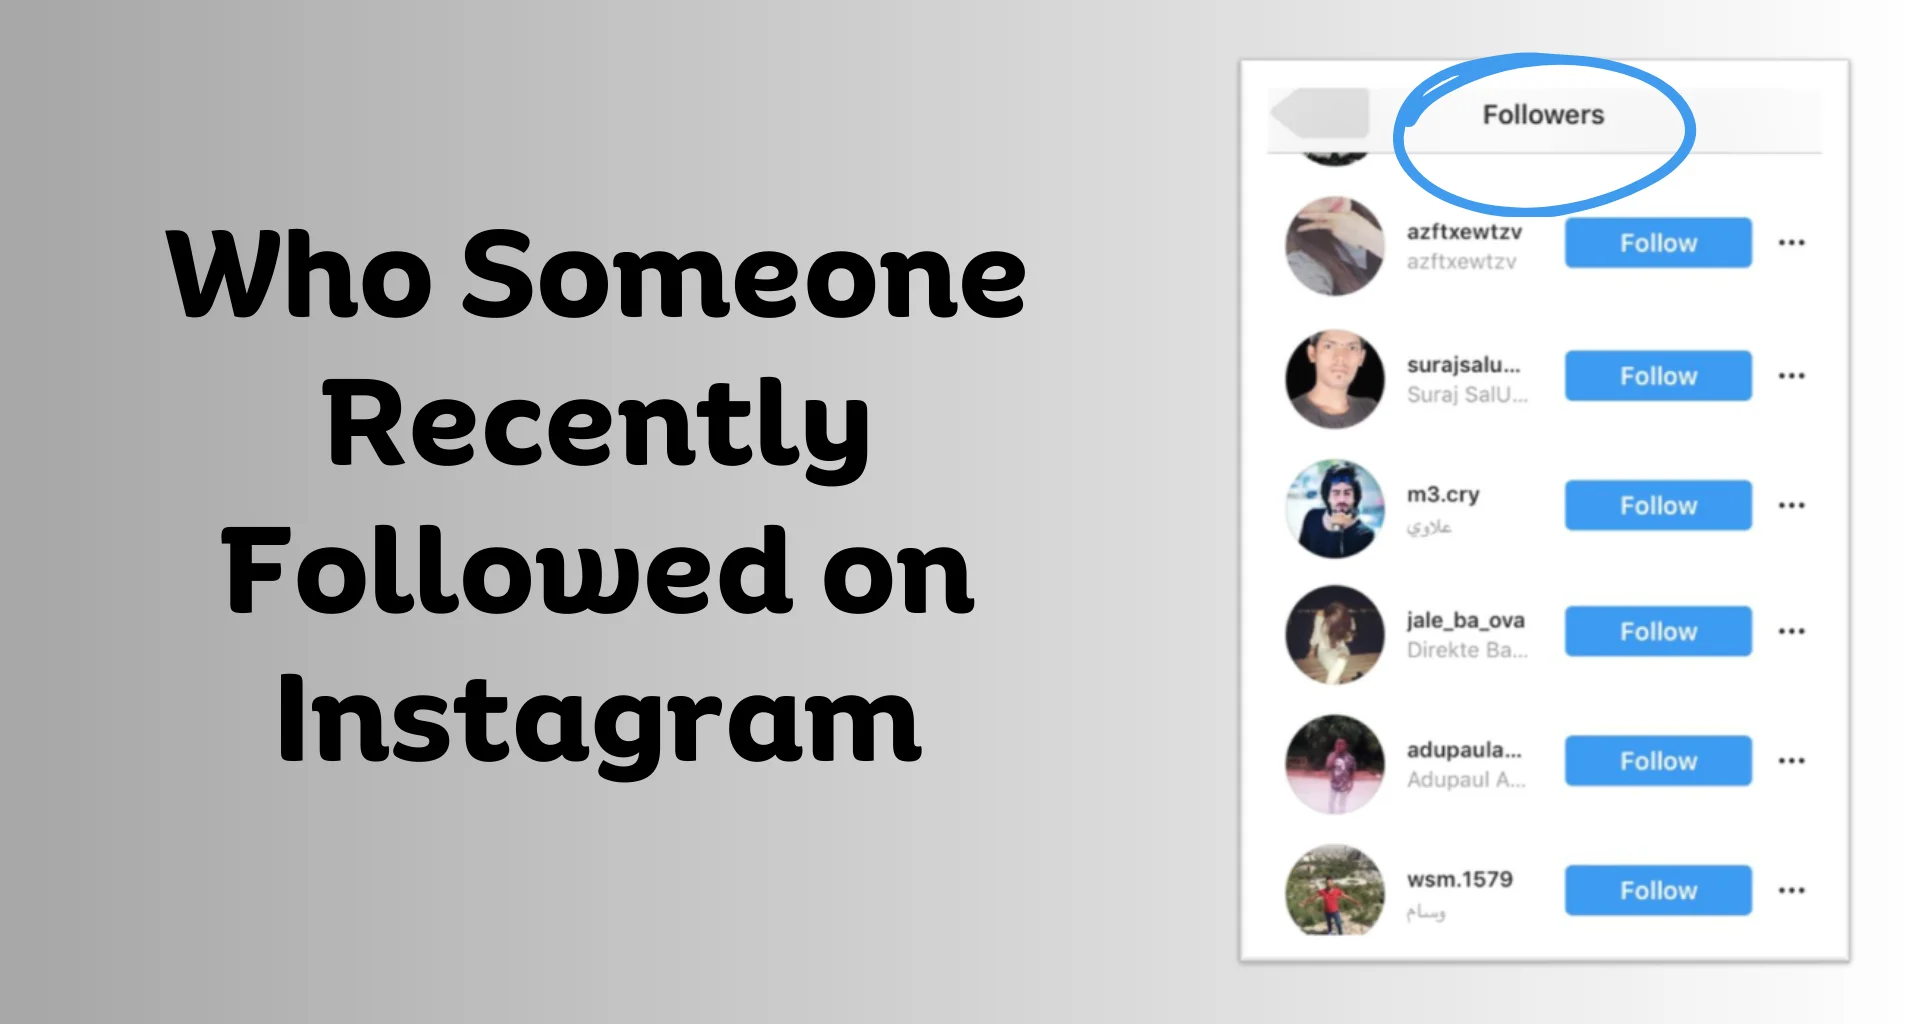
Instagram is a popular social media platform where people share their lives through photos and videos. Sometimes, you might be curious about who someone recently followed on Instagram, whether it’s a friend, influencer, or public figure. The process differs for public and private accounts. For private accounts, Instagram sends a message to the account holder to accept the following request, while for public accounts, it only sends a notification that someone has started following them.
This blog will guide you through multiple ways to check someone’s recent followers and provide a step-by-step guide to view the recent followers list.
How to see the Instagram followers list in order
Instagram doesn’t provide a feature that allows users to view someone else’s followers list in a specific order, such as chronologically or by activity. The followers list displayed on someone’s profile is typically arranged by Instagram’s own algorithm, which might consider factors like mutual friends, interaction frequency, and user activity.
However, if you want to see your own followers or the followers of a public account in a specific order, here are a few tips:
- Mutual Friends First: Usually, Instagram shows followers who are mutual friends at the top of the list. This is particularly useful if you are looking at a friend’s followers.
- Manual Sorting: If you need the followers list in a specific order (like chronological), you’ll have to manually track new followers over time. This works best for accounts with slower follower growth. Occasionally scan the list for unfamiliar usernames; new ones might be recent followers. Take regular screenshots of your followers list and manually record the usernames of new followers periodically.
- Third-Party Apps: Some third-party apps claim to offer more detailed insights into follower lists, including sorting by different criteria. Be cautious with these, as many violate Instagram’s terms of service and can compromise your account security.
- Instagram Insights: If you have a business or creator account, Instagram Insights provides more detailed analytics about your followers, though it still won’t sort followers in the list view.
To sum up, Instagram doesn’t offer a direct way to sort someone’s followers list in a specific order, and manual tracking or third-party tools are your main alternatives. Always be cautious with third-party apps and prioritize your account’s security.
Why Can’t We See the Exact Follower Order?
The exact order of Instagram followers remains hidden for several reasons, primarily centered around privacy, user experience, and platform efficiency. Revealing the precise sequence of followers raises significant privacy concerns, as it could make users uncomfortable with the traceability of their following activities.
To ensure a smooth user experience, Instagram prioritizes displaying followers based on algorithms that consider factors like mutual connections, interactions, and relevance.
Additionally, managing and displaying an exact follower order for millions of users would require substantial data resources, potentially straining platform efficiency and scalability. By not disclosing the exact follower order, Instagram also helps prevent potential abuse, such as stalking or harassment, by adding a layer of security and making it harder to track someone’s following activity closely.
Methods to Check Recent Instagram Followers
On the Instagram App (iOS/Android):
- Open the Instagram app on your mobile device.
- Go to your profile by tapping the profile icon at the bottom right corner.
- Tap on “Followers” to see the list of people who follow you.
The followers list is typically not sorted in any specific order (like chronological order), but rather it might be influenced by Instagram’s algorithm, which takes into account mutual followers, interactions, and other factors. However, if you want to view it in a different order, you can try the following:
Using the Instagram on Desktop:
- Open a web browser and go to Instagram.com.
- Log in to your account if you’re not already logged in.
- Go to your profile by clicking your profile icon at the top right corner.
- Click on “Followers” to open the followers list.
Third-Party Tools:
Using third-party tools to view your Instagram followers list in a specific order, such as chronological order, can be helpful but also comes with risks. Here are some popular tools that can help with managing and analyzing your Instagram followers: Hootsuite, Sprout Social, Iconosquare, Social Blade, and Followers Analyzer for Instagram (Mobile App).
Steps to Use Third-Party Tools:
- Choose a Tool: Select one of the tools mentioned above based on your needs and preferences.
- Sign Up/Log In: Create an account on the chosen platform or download the app.
- Connect Your Instagram Account: Follow the instructions to link your Instagram account to the third-party tool.
- Access Follower Analytics: Navigate to the analytics or followers section of the tool to see detailed information about your followers, including the order in which they followed you if available.
Example with Iconosquare:
- Sign Up: Go to the Iconosquare website and sign up for an account.
- Connect Account: Connect your Instagram account by following the on-screen instructions.
- Analytics Dashboard: Once connected, go to the analytics dashboard.
- Followers Insights: Look for the ‘Followers’ section to get insights and details on follower growth and order.
Using these tools, you should be able to gain a better understanding of your followers and their engagement patterns on Instagram.
Extracting Value from the Follower List
While you can’t see the exact order, the follower list offers valuable insights:
- Competitor Audience: See who your competitors follow and who follows them back to understand your target audience.
- Collaboration Tracking: Monitor the follower list of accounts you collaborate with to see if your promotion generated new followers for them (and vice versa).
- Growth Analysis: Regularly check the follower list to identify periods of rapid growth and see if you can pinpoint the content or strategies that fueled it.
Remember: Always respect user privacy and avoid using these methods for malicious purposes.
Conclusion
While Instagram doesn’t offer a straightforward way to see who someone recently followed, using the methods mentioned above can help you get an idea of their recent activity. Always be mindful of privacy and the ethical implications of monitoring someone’s social media activity.
How to Export Instagram Insights on a Sc
Have you ever looked at your Instagram analytics, trying to figure out what your audience likes? Understanding how your followers interact with your content is key to succeeding on Instagram. Instagram Insights provides a lot of useful data about your reach, engagement, and follower demographics. However exporting this data can be a hassle. You can download reports for specific periods, but doing it manually makes it hard to track trends over time.
That’s where scheduled Instagram Insights experts come in. Imagine having your data automatically exported at regular intervals, making it easy to collect and analyze. Let’s explore how you can set up this helpful practice.
Methods for Scheduled Exports
There are two main approaches to achieve scheduled Instagram Insights export: utilizing third-party tools or crafting custom solutions.
Use Third-party Tools For Automation:
Several social media management platforms offer seamless integration with Instagram and automate the export of your Insights data. Popular options include:
- Buffer: Known for its user-friendly interface, Buffer allows you to connect your Instagram account and schedule automatic exports of key metrics like follower growth, engagement rates, and post-performance. It offers both free and paid plans, with paid tiers unlocking advanced analytics features.
- Later: Focused on visual content planning, Later integrates with Instagram and automates Insights export. You can set up schedules to receive reports on reach, impressions, and audience demographics at your preferred intervals. Later also offers a freemium pricing model, with paid plans providing more in-depth analytics capabilities.
- Hootsuite: A comprehensive social media management platform, Hootsuite allows you to manage multiple social media accounts, including Instagram. Hootsuite integrates with Instagram Insights and offers scheduled export options for various data points. Their pricing structure caters to different team sizes and needs, with paid plans offering more advanced features and analytics tools.
These tools typically connect to your Instagram account via a secure authorization process. Once connected, you can configure automated exports to receive your data at daily, weekly, or monthly intervals, depending on your preference.
Custom Solutions:
For users with a knack for automation, platforms like Zapier offer a way to build custom workflows for scheduled Instagram Insights export. This approach requires some technical knowledge, but it provides maximum flexibility for tailoring the export process to your specific needs.
Here’s a simplified breakdown of setting up a Zapier automation:
- Connect Zapier to Instagram: Establish a secure connection between Zapier and your Instagram account using their API.
- Trigger the Export: Choose the specific action that triggers the export, such as a new post or the end of a designated time period.
- Define the Destination: Select where you want your data exported – a spreadsheet, cloud storage solution, or another analytics tool.
- Schedule Automation: Set the desired frequency for automated exports, ensuring your data is collected consistently.
While this method offers greater customization, it requires some technical know-how and may involve additional setup time compared to using third-party tools.
Benefits of Scheduled Exports
Imagine a world where gathering valuable Instagram data doesn’t involve endless manual downloads. Scheduled exports turn this dream into reality, knowing a treasure trove of benefits for marketers and content creators alike.
- Save Time: Scheduled exports automate the process, freeing up your valuable time to focus on crafting winning content strategies based on the insights you gain.
- Consistent Data: Manual downloads often create gaps in your data collection. Scheduled exports ensure consistent data gathering at your chosen intervals, allowing you to identify trends and track performance over time with ease. This consistent flow of information empowers you to make data-driven decisions that optimize your Instagram presence.
- Uniting Marketing Tools: Scheduled exports allow you to seamlessly integrate your Instagram Insights data with these platforms. This creates a holistic view of your performance, allowing you to identify cross-channel connections and refine your overall marketing strategy.
- Accessible Data Insights: Knowing your historical data is readily available provides peace of mind. Scheduled exports ensure you have a complete record of your performance, allowing you to compare past and present results and measure the effectiveness of your strategies. This eliminates the worry of misplaced reports or missing data points, keeping you in control of your Instagram analytics.
By embracing scheduled Instagram Insights exports, you gain a powerful edge. Not only will you save time and effort, but you’ll also unlock a deeper understanding of your audience and optimize your content for maximum impact.
Choosing the Right Method
With both third-party tools and custom solutions offering scheduled Instagram Insights export, the question arises: which method is right for you? Here’s a breakdown of key factors to consider when making your choice:
- Budget: Third-party tools often offer freemium plans with limited features, while paid tiers unlock advanced functionalities. Custom solutions using Zapier require a paid subscription depending on your usage level. Evaluate your budget and choose the option that aligns best with your financial resources.
- Technical Expertise: These tools are designed for ease of use, with intuitive interfaces and clear instructions. Custom Zapier workflows require some technical knowledge to set up and maintain. Be honest about your comfort level – if you’re new to automation, a user-friendly third-party tool might be the better fit.
- Desired Level of Automation and Features: Third-party tools offer various automation levels and features depending on the chosen platform. Consider the level of customization you need – do you simply want basic data exports, or do you require advanced filtering or data manipulation capabilities?
- Integration Needs with Other Tools: If you use a specific analytics platform or social media management tool, ensure compatibility with your chosen export method. Many third-party tools integrate seamlessly with popular platforms.
Additional Considerations Tips:
Now that you’ve chosen your export method, here are some additional tips to ensure you get the most out of scheduled Instagram Insights:
- Frequency: The ideal export frequency depends on your needs. If you’re managing a rapidly growing account, daily exports might be best to stay on top of trends. For established accounts, weekly or even monthly exports might suffice.
- Data Security First: When using third-party tools, prioritize data security. Choose reputable platforms with reliable security measures and clear privacy policies. Review their data handling practices to ensure your Instagram data is protected.
By following these tips and considerations, you can transform scheduled Instagram Insights export from a simple data collection tool into a strategic advantage. With consistent data readily available, you’ll be empowered to make informed decisions and elevate your Instagram presence to new heights.
Conclusion:
Scheduled Instagram Insights exports offer a game-changing solution, freeing you from the shackles of manual downloads and empowering you with a constant flow of valuable information. By leveraging this practice, you’ll unlock a treasure trove of benefits
Whether you choose user-friendly third-party tools or explore customization, there’s a solution perfectly suited to your needs and technical expertise. The key takeaway? Embrace scheduled Instagram Insights exports to unlock a deeper understanding of your audience and craft data-driven strategies that propel your Instagram success.
Ready to take control of your Instagram data? Share your experiences with data export tools in the comments below! We’d love to hear your insights and recommendations.
